Thursday, May 30, 2013

Simplicity 3669 - Pajamas - Part 6

Tank Top and Shorts

And now for the final installment - the tank top and shorts.  I used to be scared of sewing knit fabrics.  Now, they only make me mildly anxious.

The pattern envelope shows an applique on the tank top so I got out my pen and paper and created a reasonable facsimile of the elephant on the fabric.  Not bad, huh?  You should see my Anpanman.


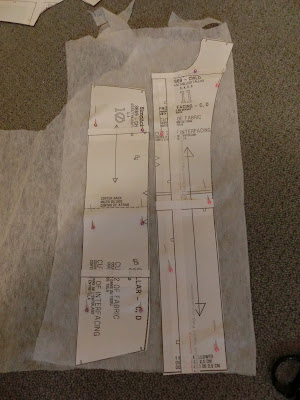
 Next I cut out the pieces and fused iron-on interfacing to the back.


Our elephant can now hear and see.


And I managed to sew it on to the tank top front without too much fuss.  First, I used an applique stitch to attach it and then I used a triple stretch stitch to do the outline.


Pa-oooooon.  (That's what elephants sound like when they're speaking Japanese.)

Now for the really fiddly bit - the shoulder straps.


 First, they need to be attached to the outside...

 ...and then folded over like bias binding to finish.  I was quite impatient to finish this project so the inside is a bit messy.


And we have a cute little tank top!  Hooray!

Here is the whole collection...


Conclusion

This was a great little pattern and I'll definitely make it again as it goes up to size six - maybe I'll make some flanelette pajamas for the wintertime.

Wednesday, May 29, 2013

Simplicity 3669 - Pajamas - Part 5

Los Pantalones

No, I don't speak Spanish.  The title is a nod to the fact that, thanks to sewing, I now know the words for front, back and cut in at least three languages.  That's gotta come in handy one day, right?

The trousers for this pattern were super easy and quick to make.  Since I was using an overlocker, I changed the order of instructions a bit so that I didn't have to keep switching between machines.

First, I hemmed the trouser legs and then sewed the bottom 2 cm of the inner leg seam.  This helps to keep the hem in place when using the serger.  Without this stitching, I end up having a hem that doesn't match up properly.


 Very nice...


Now for the crotch seam.  Have I mentioned how much I love my overlocker?


 Next, we press the waistband to create the elastic casing.  The elastic goes in and...


...we have pantalones!

Next:  Extra Credit

Tuesday, May 28, 2013

Simplicity 3669 - Pajamas - Part 4

Sewing the Shirt Part Deux 

So here we go and it's time to put the collar on. I pinned, I sewed...and failed miserably.  There was an enormous hole where the shirt front wasn't properly sandwiched between the collar.  A timely reminder of the importance of tacking and the perils of late-night sewing.


"Stuff this malarkey!" I said in my best Dick Van Dyke cockney accent and decided to go for a low-tech solution: tacking by hand.  You can see my lovely red stitches below.


And it worked!  Not perfect but not too shabby, either.


 So back to the machine to put some ease stitching to the sleeves to give a lovely 3D effect.


I also decided to hem the bottom of the shirt as I was doing the sleeves anyway.  Here is where I would like to introduce one of my favourite pieces of sewing-related equipment - my iron guide.  It is made of a flexible heat-proof material.and all you do is just align the edge of your fabric with the desired hem width and fold the fabric over the iron guide with your iron.  It makes hemming almost fun...almost.

 Almost there!

Attaching the arms was surprisingly easy.  I pinned everything together and went veeeery slowly, adjusting the fabric as I went.


 Now for the buttonholes... There is a handy little buttonhole guide included with the pattern.


Add some buttons and there we have it - a rather snazzy pajama shirt.


Next up: Los Pantalones

Saturday, May 25, 2013

Simplicity 3669 - Pajamas - Part 3

Sewing the Shirt

I was all ready to fire up my overlocker - also known as a serger.  I spent 10 minutes threading it up with some lovely pink thread and was eager to get going.  Then I read the instructions:
"Stay-stitch around the neck."  Wait a minute...that needs to be done on a regular sewing machine, not an overlocker - noooooo!

I have recently acquired an overlocker and love it - it's like driving a hot-rod after only having ever owned a practical-but-boring family sedan.  It's quick, it's noisy and it gets things done!  It rocks. Maybe that's why they call them ロックミシン [rokku mishin] in Japan. 

So the stay-stitching is done and I'm finally ready to fire up the mishin, erm, machine.  I go back to the instructions: "Serge shoulder and side seams" *hooray!* "down to large dots."  Oh man, now I have to get out my marker pen  and pattern pieces.


 Now, I would usually mark the dots during the cutting process but my marker pen is one of those disappearing ink ones.  It's great but sometimes the markings only last a few days.  This can be a little bit frustrating when I leave a project for a couple of days and come back to find that all of the dots and markings have disappeared.

Now it's finally time to use the overlocker!  Woo hoo!

 And because the thing is so efficient, it only took about 30 seconds to do the job.  Oh well.

Now we have something that looks a little bit more shirt-like. Now it's time to fuse the interfacing to the top collar and button placket pieces.


 So I get out my trusty iron (pronounced the Japanese way - iRon) and my miniature ironing board.

Fun fact:  Most ironing boards in Japan are stupidly small - mine is the size and shape of a kick board. The size would make sense if the clothes and irons were also tiny but everything else is regular-sized!  It's also only about 25 cms high so I have to kneel or sit on the floor while ironing.  It can be particularly annoying when ironing men's shirts.  Place garment on ironing board, iron, scootch garment over a bit, iron, scootch again and repeat. 

So now on to the collar.  We have to cut some notches and fold the middle bit up.  The reason for this is a mystery but I'm sure it will become clear eventually.


 Then we stitch around the collar, right sides together and trim off the seams and corners.  Done!


Top stitch around the edge and we have a pretty nifty-looking collar!


 Now the pattern instructions say to baste the underside of the collar to the neck edge.  (I prefer the term 'tack' to 'baste' - baste seems like it should involve a turkey.) This instruction seemed a bit strange because the collar has been the last thing to sew on every other shirt I have ever made. But, whatever you say Simplicity-san...

So our shirt is finally coming together.

Next time: Sewing the Shirt Part Deux.

Simplicity 3669 - Pajamas - Part 2

Snip snip (choki choki)


So here we go - the pieces are ready to be pinned to the fabric and we are one step closer to the fun bit.

Little Miss went down for a nap this afternoon and I sprang into action.  First, let's have a look at the fabric layout for the shirt.


Right, so the layouts for the shirt are different according to the size of the garment and the width of the fabric.  I am making size 3 with 115 cm fabric so 4A is for me.  Some of the pieces are coloured light grey but it didn't show up well on my print-out, hence the scribbles in pen.

 
So here's what it looks like IRL.  The fabric has been folded vertically and the selvedges are together at the bottom of the picture.  The arrows on the pieces mean that the piece has to be cut on the grain - the arrows must be parallel with the selvedges.  Two of the pieces are placed printed side down to make the layout more compact and to use the fabric as economically as possible.

 And don't forget the notches.  These triangular marks are useful for matching up pieces when you are sewing.  I used to cut out the little triangle but ended up with tiny fabric triangles everywhere.  Now I just snip and be done with it.
 And the layout for the pants (also known as trousers.)
 The tank top front...
 ...and the tank top back.
 Once you have cut out all the pieces, you can breathe a sigh of relief and admire your handiwork.  I am rubbish at cutting out curves so I usually cut generously around curved bits and trim once the piece has been cut out.  This is particularly useful for knit fabrics which have the annoying habit of stretching while you are cutting. 
And it looks like I have just enough iron-on interfacing to get the job done.  Hooray!  These bits are for the collar and the button placket.

Little Miss woke up five minutes after I packed up everything.  All in all, a good afternoon's work.

Next: The Urge to Serge

Thursday, May 23, 2013

Simplicity 3669 - Pajamas - Part 1


Fabric Selection and Pattern Assembly


 My inaugural project will be Simplicity 3669 - a nice, simple pajama pattern.
I will be making D and E (short-sleeved shirt and trousers) and A (tank top).  I might also make a pair of shorts if enough fabric is left over.

I am using a printable pattern as it costs a fortune to send the paper version from the US.  It was a little surprising to find that the whole pattern (including instructions) requires an incredible 66 A4 pages.  I can almost hear the deforestation from here.

So here is a picture of the fabric I plan to use:

Just look at the kids in that picture. They look pretty happy with their choice of sleepwear, don't they?  I want my kid to look like that.  Yeah.

I found some super-cute animal print double gauze fabric online and just had to buy it because it has pink elephants on it!  My daughter is almost 3 and she loves elephants (except she calls them zo-san).  The coordinating fabric is some pink knit material I had in my stash.

***
Fun fact: There is a children's song in Japan about an elephant called Zo-san.  The lyrics go:
Elephant, elephant,
You have a long trunk,
Oh yeah,
So does your mother.

Apparently, it was written by the Japanese version of Captain Obvious.

***
So, once you have glued your sheets of copy paper together, you get something like this:

It's like a copy paper quilt!  You have to line up the little squares so that they are next to each other (don't overlap them - found that one out the hard way.)  I prefer to use squeezy liquid glue as it is more forgiving than a glue stick.  Even so, things can get decidedly wonky after page 20 or so.  Once the gluing is finished, you have a couple of enormous poster-sized sheets.  Now to utilise those handy paper-cutting skills I learned in kindergarten.


Several hours and a suspected case of RSI later, we have our pattern pieces!  Hooray!

Just a word of warning to those considering using the printable pattern - this version creates a lot of waste paper.  At least a third of the paper I used had to be thrown away.  If you can, use copy paper that has already been printed on one side.

Next up: we cut!